

- select-the-right-cherries-for-your-perfect-pie
- craft-the-perfect-cherry-pie-crust
- create-a-balanced-flavorful-cherry-filling
- bake-and-cool-your-cherry-pie-like-a-pro
- real-baking-stories-and-bonus-pro-tips
1. Select the Right Cherries for Your Perfect Pie
To bake the perfect cherry pie every time, everything begins with choosing the right cherries. You might think any cherry will do—but that's where most home bakers go wrong. Understanding the flavor profiles and characteristics of different cherries can make or break your pie.

Julius Sturgis Pretzel Bakery / pretzel factory lititz pa
LititzLancaster CountyPennsylvania
219 E Main St, Lititz, PA 17543, USA
1.1. Sour vs. Sweet Cherries
Sour cherries—like Montmorency or Morello—are typically preferred for traditional cherry pies because they offer a tangy bite that balances well with sugar. Sweet cherries such as Bing or Rainier are delicious raw, but they tend to result in overly sweet pies unless carefully adjusted with lemon juice or reduced sugar.
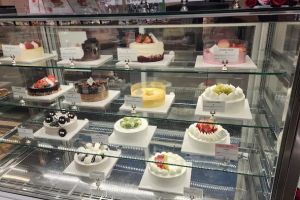
L’Ami Bakery & Cafe / bakery in h mart
48-18 Northern Blvd, Long Island City, NY 11101, USA
1.2. Fresh, Frozen, or Canned?
If it’s cherry season (usually late spring to midsummer in most U.S. states), go fresh for the fullest flavor. Frozen cherries are your best off-season alternative, just be sure to thaw and drain them properly. Canned cherries in water can work too—just avoid cherry pie filling from a can, which often contains excess sugar and artificial thickeners.
1.3. Tip from a Michigan Grandmother
One reader from Traverse City, MI (home to the National Cherry Festival) shared that she always uses a mix of fresh tart and sweet cherries. “It keeps the flavor complex and vibrant,” she says. It’s small tweaks like this that elevate an average pie to a memorable dessert.
2. Craft the Perfect Cherry Pie Crust
Even the most delicious cherry filling can fall flat without a flaky, buttery crust. Your crust is the pie’s foundation—literally and figuratively. Nailing this step is essential for consistency and structure in every bite.
2.1. Homemade vs. Store-Bought
Homemade crusts, especially all-butter ones, offer better flavor and texture. If you’re short on time, store-bought can work—but be picky. Avoid brands with too many preservatives or hydrogenated oils. Pro tip: Always keep your butter cold and handle the dough as little as possible.
2.2. Blind Baking the Bottom Crust
To avoid the dreaded soggy bottom, consider partially blind baking your bottom crust. Line it with parchment paper, fill with pie weights, and bake for 10-12 minutes before adding your filling. This gives you a firm, golden base that can support juicy cherries without going limp.
2.3. Decorative Lattices and Crust Edges
Beyond taste, a well-woven lattice top or braided edge makes your cherry pie visually irresistible. Use a fluted cutter or even cookie cutters to create seasonal designs. A simple egg wash before baking adds shine and encourages browning.
3. Create a Balanced, Flavorful Cherry Filling
The heart of your pie lies in its filling. Achieving the right balance between tartness, sweetness, and texture is what takes your cherry pie from ordinary to unforgettable.
3.1. Sweeteners and Thickeners
Granulated sugar is a must, but don’t overlook the impact of brown sugar or a splash of maple syrup for deeper flavor. As for thickening agents, cornstarch is common, but some bakers swear by tapioca starch for a silkier finish. Make sure to simmer your cherries gently before adding them to the crust to release excess moisture.
3.2. Flavor Enhancers
A dash of almond extract can dramatically boost the cherry flavor. Lemon zest adds brightness, and a pinch of salt balances the sweetness. Don’t forget a spoonful of butter dotted over the filling before topping the crust—it helps with both texture and flavor blending.
3.3. Keep It from Being Watery
This is one of the most common mistakes in baking cherry pie. Whether you’re using fresh or frozen cherries, always drain off excess juice and cook down the filling slightly before adding it to the crust. Let it cool a bit to prevent a soggy mess during baking.
4. Bake and Cool Your Cherry Pie Like a Pro
Once your pie is assembled, proper baking and cooling ensure the filling sets correctly and the crust browns perfectly.
4.1. Bake at the Right Temperature
Start with a high temperature—about 425°F—for the first 15 minutes to set the crust. Then reduce to 375°F and continue baking for 35–45 minutes. Watch for bubbling fruit and a golden top crust. Use a baking sheet underneath to catch any bubbling over (your oven will thank you).
4.2. Cooling is Key
Don’t slice into your pie too soon. Cooling allows the filling to gel and prevents it from running all over your plate. Let the pie rest at room temperature for at least two hours before serving.
4.3. Reheat and Store
Cherry pies can be refrigerated for up to four days. Reheat slices in a toaster oven to revive that fresh-baked texture. Many customers of Heavenly Delights Bakery tell us their pies taste even better the next day, after the flavors fully marry.
5. Real Baking Stories and Bonus Pro Tips
Food blogger Rachel Simmons once went viral on TikTok with her “Pie Disaster Turned Masterpiece” video. She burned the first crust but salvaged it by turning the filling into mini turnovers using store-bought pastry. The result? 3 million views and a flood of praise for her creativity. The takeaway: even mistakes can lead to new traditions.
5.1. Use a Glass Pie Plate
Glass conducts heat evenly and lets you see when the bottom crust is perfectly browned. Metal can cause faster browning, but it’s harder to monitor doneness.
5.2. Try a Cherry Pie Kit
If you’re intimidated by pie-making from scratch, consider starting with a curated cherry pie kit from Heavenly Delights Bakery. They offer pre-measured ingredients and easy-to-follow instructions, helping beginners gain confidence while still baking at home.
5.3. Elevate with Toppings
Serving your pie à la mode? Vanilla bean ice cream is a classic, but try almond whipped cream or a drizzle of dark chocolate sauce for a creative spin. Add crushed pistachios or toasted oats for an elevated crunch.


 Nagoya Bakery4.0 (25 reviews)
 The Quantum Baker0.0 (0 reviews)
 Valerio's Tropical Bake Shop4.0 (43 reviews)
 Manny's Bakeshop & Restaurant4.0 (19 reviews)
 Nanding's Bakery4.0 (368 reviews)
 Aloha Sunrise Granola5.0 (5 reviews)
 Bakery Service Charge Check: Bill, Tips, and Group Split
 Bakery Texture Guide: A Practical US Checklist
 Bakery Cake Quote: Size, Design, Pickup, and Allergen Notes
 Bakery Bread Crumb Check: Freshness, Cutting, and Serving
 Bakery Cupcake Pickup: Count, Box, and Safe Transport
 Bakery Whole-Grain Bread: Ingredients, Texture, and Freshness