
Master the Art of Elegant Homemade Chocolate Eclairs
- 1-Why-Bakery-Style-Chocolate-Eclairs-Are-Worth-Making-at-Home
- 2-What-Makes-Chocolate-Eclairs-Feel-Truly-Bakery-Style
- 3-Ingredients-and-Tools-That-Set-You-Up-for-Success
- 4-How-to-Make-the-Choux-Pastry-Step-by-Step
- 5-How-to-Make-a-Perfectly-Piped-Filling
- 6-How-to-Glaze-and-Assemble-Your-Eclairs
- 7-Common-Eclair-Mistakes-and-How-to-Fix-Them
- 8-Serving-Storage-and-How-to-Take-Your-Eclairs-Further
1. Why Bakery-Style Chocolate Eclairs Are Worth Making at Home
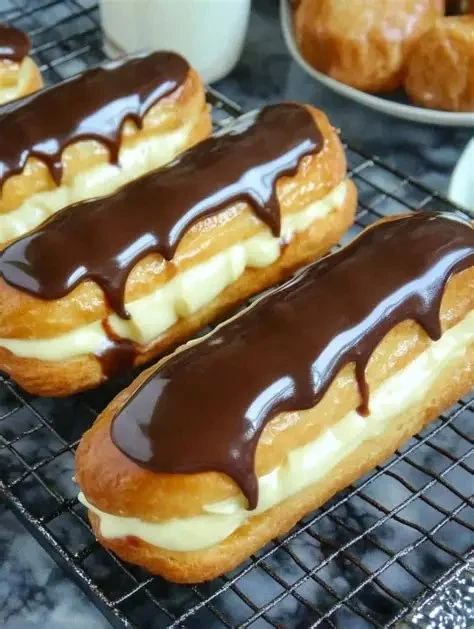
There is something special about biting into a bakery-style chocolate eclair that has a thin, delicate shell, a cool and silky center, and a glossy chocolate top that cracks just slightly under your teeth. It feels polished, elegant, and a little luxurious. That is exactly why so many home bakers want to learn how to make bakery-style chocolate eclairs with perfectly piped filling instead of settling for flat, soggy versions that look good only in pictures.
What surprises most people is that homemade eclairs are not impossible. They just ask for a bit more attention than a simple cookie or loaf cake. In my experience, eclairs are less about advanced talent and more about understanding a few key moments: how the dough should look in the pot, how the piped shells should be spaced on the tray, how the filling should feel in the piping bag, and when to stop fiddling and trust the process.
Once you understand those moments, everything becomes easier. The result is a dessert that feels genuinely impressive, whether you are baking for family, friends, a dinner party, or simply because you want to master a classic pastry in your own kitchen.

Mille-feuille Bakery Cafe / mille-feuille bakery new york
New YorkNew York CountyNew York
2175 Broadway, New York, NY 10023, USA
1.1 Why homemade often tastes better
1. Freshly baked choux pastry has a crispness that disappears quickly in mass-produced pastries.
2. Homemade filling can be richer, smoother, and less overly sweet than store-bought versions.
3. You control the chocolate glaze, the filling texture, and the final size of each eclair.

Nothing Bundt Cakes / nothing bundt cakes marlton
South PlainfieldMiddlesex CountyNew Jersey
4919 Stelton Rd, South Plainfield, NJ 07080, USA
1.2 Why people often fail the first time
1. They undercook the choux paste on the stove.
2. They open the oven too early and collapse the shells.
3. They make the filling too loose, which ruins the clean piped center.
2. What Makes Chocolate Eclairs Feel Truly Bakery-Style
If you want bakery-style chocolate eclairs, you need to think about structure as much as flavor. Great eclairs are not just sweet pastries. They are layered textures working together in a very specific way. The shell should be light but not hollow in a flimsy way. The filling should be generous but controlled. The chocolate topping should look smooth and intentional, not messy or grainy.
In professional pastry shops, this balance is what creates that polished finish people remember. At home, you can recreate it by focusing on three things: shell shape, filling consistency, and clean assembly. The more attention you pay to those details, the more your eclairs move from homemade dessert to bakery-level pastry.
2.1 The ideal shell
1. It should be golden, dry, and firm enough to hold filling without going limp right away.
2. It should have enough space inside for cream, but not so much emptiness that it feels disconnected when you bite into it.
3. It should have a neat, elongated shape rather than an uneven or twisted look.
2.2 The ideal filling
1. It should be smooth enough to pipe easily.
2. It should be thick enough to stay in place without leaking.
3. It should taste rich and creamy, not floury or overly gelatinous.
2.3 The ideal finish
1. The glaze should sit neatly on top without pouring down every side.
2. The final pastry should look uniform on the tray.
3. Each bite should deliver shell, filling, and chocolate together.
3. Ingredients and Tools That Set You Up for Success
Before you start, it helps to gather everything. Eclairs move in stages, and once the choux dough is ready, hesitation is not your friend. A calm setup makes the process smoother and much more enjoyable.
3.1 Ingredients for the choux pastry
1. Water
2. Whole milk
3. Unsalted butter
4. A small amount of sugar
5. Salt
6. All-purpose flour
7. Eggs
I like using a mix of water and milk because it gives the shells both structure and a little extra color. Butter matters here too. It adds flavor, but it also affects texture, so this is not a recipe where random substitutions usually help.
3.2 Ingredients for the filling
1. Whole milk
2. Egg yolks
3. Sugar
4. Cornstarch
5. Butter
6. Vanilla extract or vanilla bean paste
7. Optional whipped cream folded in for a lighter texture
A classic pastry cream is the safest path if you want perfectly piped filling. It is stable, rich, and easy to flavor. Some bakers prefer whipped cream or diplomat cream, but pastry cream gives you more control, especially if your goal is a cleaner bakery-style finish.
3.3 Ingredients for the glaze
1. Dark or semisweet chocolate
2. Heavy cream
3. Optional corn syrup or butter for extra shine
3.4 Tools that help
1. Medium saucepan
2. Mixing bowls
3. Wooden spoon or sturdy spatula
4. Piping bags
5. Large plain piping tip
6. Fine mesh sieve
7. Baking sheet
8. Parchment paper
9. Cooling rack
If you bake pastries often, investing in a reliable piping setup makes a real difference. The more control you have over shape and filling, the more consistent your eclairs become. If you want to explore better pastry tools, fillings, and baking upgrades, this is the kind of recipe that naturally makes you want to learn more and shop smarter.
4. How to Make the Choux Pastry Step by Step
This is the heart of the recipe. Choux pastry can look intimidating, but once you understand the texture cues, it becomes much less mysterious.
4.1 Build the base on the stove
Add the water, milk, butter, sugar, and salt to a saucepan and bring everything just to a boil. Once the butter is fully melted and the liquid is hot, add the flour all at once. Stir firmly and continuously.
This stage matters more than beginners expect. You are not just mixing. You are cooking moisture out of the dough and building the foundation for a shell that can puff in the oven instead of turning dense.
1. Stir until the dough pulls away from the sides of the pan.
2. Keep cooking for another minute or two to dry it slightly.
3. Look for a thin film on the bottom of the pan, which often signals the paste is ready.
4.2 Cool the dough slightly before adding eggs
Move the dough to a bowl or the bowl of a stand mixer and let it cool for a few minutes. If it is too hot, it can partially cook the eggs, and the dough will turn lumpy instead of smooth.
4.3 Add eggs gradually
Add the eggs one at a time, mixing thoroughly after each one. The dough may look broken halfway through. That is normal. Keep going. Eventually it becomes glossy and smooth.
The final dough should fall from the spatula in a thick ribbon. Many bakers describe it as forming a soft V-shape. If it is too stiff, the shells may not rise well. If it is too loose, they may spread instead of puffing.
4.4 Pipe the eclair shells
Transfer the dough to a piping bag fitted with a large plain tip. Pipe straight lines onto a parchment-lined tray, keeping the size as even as possible.
1. Aim for medium, consistent lengths.
2. Leave space between each shell because they expand.
3. Smooth any sharp ends with a fingertip lightly dipped in water.
4.5 Bake with patience
Bake until the shells are puffed, golden, and dry. The biggest mistake here is pulling them too early because they look done from the outside. A pale shell is usually an underbaked shell, and underbaked shells collapse fast.
1. Do not open the oven in the early stage.
2. Let the shells get properly golden.
3. If needed, pierce a tiny hole near the end of baking to let steam escape and return them briefly to the oven.
Once baked, cool them fully before filling. Warm shells and chilled cream do not make good partners.
5. How to Make a Perfectly Piped Filling
The filling is where homemade eclairs often turn from decent to outstanding. A perfectly piped filling should feel smooth, rich, and intentional, not like something spooned in at the last second.
5.1 Make the pastry cream
Heat the milk until warm but not aggressively boiling. In a separate bowl, whisk the yolks, sugar, and cornstarch until pale and smooth. Slowly temper the hot milk into the egg mixture, then return everything to the saucepan and cook over medium heat while whisking.
You are looking for a thick, glossy cream that no longer tastes starchy. Once it reaches that point, remove it from the heat, stir in butter and vanilla, then strain it if needed for extra smoothness.
1. Chill the pastry cream completely before piping.
2. Cover the surface directly with plastic wrap while cooling to prevent a skin.
3. Whisk it lightly after chilling if it needs smoothing out.
5.2 Prepare for clean piping
To pipe filling neatly, transfer the chilled cream into a piping bag fitted with a small round tip or filling tip. Use the underside or ends of the eclair to make small holes.
I have found that three small filling points often work better than one. The cream spreads more evenly, and you are less likely to end up with one overfilled side and one nearly empty section.
5.3 Know when the eclair is full
1. You will feel slight resistance in the piping bag.
2. The shell becomes heavier in your hand.
3. A tiny amount of filling may start to press back at the opening.
That is usually the sweet spot. Overfilling can crack the shell or push filling out later, especially after glazing.
6. How to Glaze and Assemble Your Eclairs
Now comes the finishing stage, the part that gives eclairs their polished pastry-shop look.
6.1 Make the chocolate glaze
Warm the cream and pour it over chopped chocolate. Let it sit briefly, then stir until smooth. If you want more shine, add a small amount of butter or corn syrup.
The glaze should be fluid but not watery. If it is too hot and thin, it runs everywhere. If it is too cold, it drags and looks rough.
6.2 Dip or spoon carefully
1. Hold the filled eclair gently by the sides.
2. Dip the top into the glaze or spoon it over carefully.
3. Let excess glaze settle naturally instead of smearing it repeatedly.
6.3 Let the finish set
Place the glazed eclairs on a rack or tray and chill briefly if needed. Once set, they should look glossy, clean, and balanced.
This is the stage where the dessert stops looking like an experiment and starts looking like something from a real pastry case.
7. Common Eclair Mistakes and How to Fix Them
Every baker who learns how to make bakery-style chocolate eclairs with perfectly piped filling runs into a few problems. The good news is that most of them are fixable or avoidable next time.
7.1 Flat or collapsed shells
1. The dough may have been too wet.
2. The shells may have been underbaked.
3. The oven may have been opened too early.
7.2 Shells that are too soft
1. They likely needed more drying time in the oven.
2. Filling may have gone into shells before they were fully cool.
3. Storage conditions may have introduced too much moisture.
7.3 Filling that leaks or feels sloppy
1. The cream may not have been thick enough.
2. It may not have been chilled properly.
3. The eclairs may have been overfilled.
7.4 Grainy or dull glaze
1. The chocolate may have overheated.
2. The cream-to-chocolate ratio may have been off.
3. The glaze may have set before you used it.
One of the most useful things I learned after a few batches was that perfect eclairs are often the result of tiny corrections rather than one dramatic secret. Better dough texture, slightly longer bake time, smoother pastry cream, cleaner piping. Those details add up fast.
8. Serving, Storage, and How to Take Your Eclairs Further
Chocolate eclairs are at their absolute best when the shells still have some structure, the filling is cool, and the glaze is set but not stale. That usually means serving them the same day when possible, or within a short window after assembly.
8.1 Best serving tips
1. Chill them briefly before serving for a classic bakery feel.
2. Serve them on a simple tray so the shine and shape stand out.
3. Pair them with coffee, espresso, or black tea for a balanced finish.
8.2 Storage advice
1. Store filled eclairs in the refrigerator.
2. Keep them in a covered container so they do not absorb odors.
3. Expect the shells to soften over time, even when refrigerated.
8.3 How to improve batch after batch
1. Practice piping for more uniform shells.
2. Try different chocolate percentages for the glaze.
3. Test variations like espresso pastry cream or a lighter diplomat filling once you master the base version.
If this is the kind of dessert you want to keep improving, it may be worth exploring better piping tips, pastry tools, quality chocolate, or specialty ingredients that make bakery-style chocolate eclairs even more consistent and beautiful. For anyone serious about mastering how to make bakery-style chocolate eclairs with perfectly piped filling, learning more and choosing the right baking tools can make the next batch your best one yet.


 Auntie Anne's3.0 (9 reviews)
 Gringa Flan0.0 (0 reviews)
 The Pink Ladybug Cupcakes4.0 (23 reviews)
 Walmart Bakery1.0 (4 reviews)
 Delightful Bakery & Cafe4.0 (36 reviews)
 Paris Baguette3.0 (133 reviews)
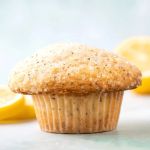 How to Make the Perfect Lemon Poppy Seed Muffins
 Discover the Rich History of Your Favorite Bakery Treats
 Why Freshly Baked Pies from Your Local Bakery Are Always Better
 The Rise of Health-Conscious Bakery Goods: What You Need to Know
 Why Some Bakeries Are Going Green and How You Can Too
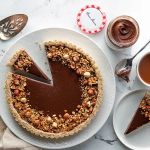 How to Make Delicious Chocolate Hazelnut Tartlets from Scratch