
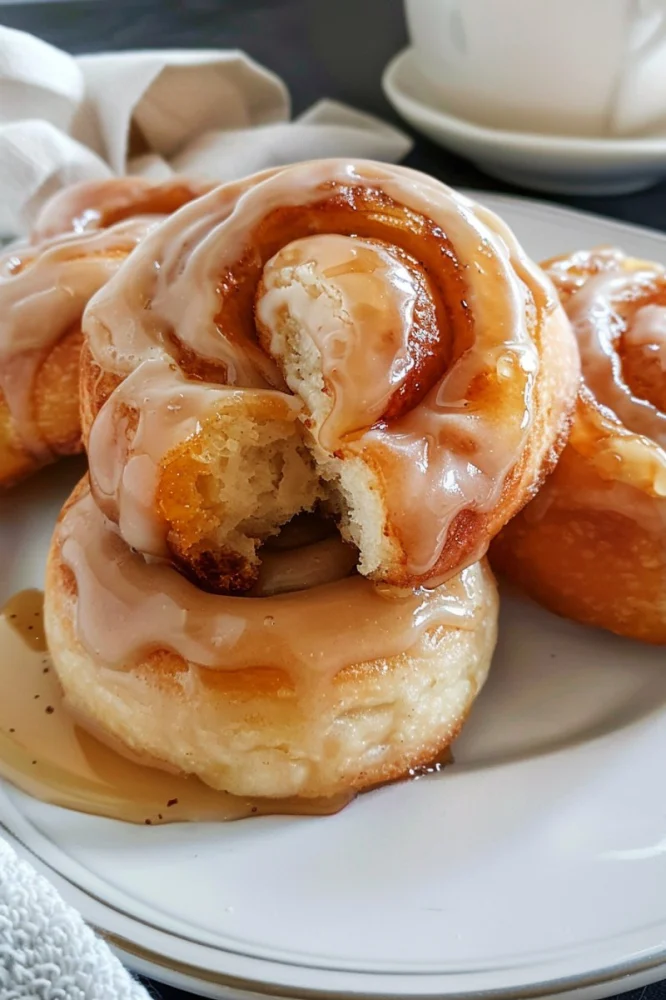
How to Make Fresh Homemade Honey Buns
- Ingredients for Honey Buns
- Steps for Making Honey Buns
- Tips for Perfect Honey Buns
- Serving and Storing Your Honey Buns
- Real-Life Story: Making Honey Buns with Family
1. Ingredients for Honey Buns
Making fresh homemade honey buns requires a few basic ingredients that are likely already in your pantry. Here's a simple list of what you’ll need:
- 3 cups all-purpose flour
- 2 tablespoons sugar
- 1 teaspoon salt
- 1 packet active dry yeast
- ¾ cup warm milk
- ¼ cup melted butter
- 2 eggs
- 2 tablespoons honey
- 1 teaspoon vanilla extract
- For the glaze: ½ cup powdered sugar, 2 tablespoons milk, 1 tablespoon honey
These ingredients come together to create soft, fluffy honey buns with a perfect balance of sweetness from the honey and the richness of butter.
Lady M Cake Boutique - Boston / lady m crepe cake
BostonSuffolk CountyMassachusetts
304 Newbury St, Boston, MA 02115, USA
2. Steps for Making Honey Buns
Follow these simple steps to create your own homemade honey buns:

Nothing Bundt Cakes / nothing bundt cake boston
NewtonMiddlesex CountyMassachusetts
170 Needham St, Newton, MA 02464, USA
2.1 Prepare the Dough
Start by warming your milk until it’s just lukewarm (about 110°F). Pour the warm milk into a large mixing bowl and add the yeast. Let it sit for 5-10 minutes until it becomes frothy. Add sugar, melted butter, eggs, honey, and vanilla extract to the yeast mixture. Stir until combined.
Gradually add flour and salt, mixing until the dough starts to come together. Knead the dough for about 5-7 minutes, or until it becomes smooth and elastic. If the dough is too sticky, add a little more flour, one tablespoon at a time.
2.2 Let the Dough Rise
Once your dough is ready, form it into a ball and place it in a lightly greased bowl. Cover with a clean towel or plastic wrap and let it rise in a warm place for about 1-1.5 hours, or until it doubles in size.
2.3 Shape the Honey Buns
After the dough has risen, punch it down to remove air bubbles. Roll the dough out into a rectangle, about ½ inch thick. Cut it into strips, and then roll each strip into a spiral shape. Place the rolled buns on a greased baking sheet, leaving a little space between each one. Let them rise again for about 30 minutes to an hour, until they puff up.
2.4 Bake the Buns
Preheat your oven to 350°F (175°C). Bake the buns for 15-20 minutes or until they’re golden brown. Keep an eye on them to avoid over-baking.
3. Tips for Perfect Honey Buns
Making honey buns at home is fun, but following a few key tips can make all the difference:
3.1 Don’t Rush the Rising Process
Allowing the dough to rise properly is essential for soft and fluffy honey buns. Be patient and let the dough double in size during each rise. The longer the dough rises, the fluffier and lighter the buns will be.
3.2 Use Warm, Not Hot, Milk
When activating the yeast, the milk should be warm but not hot. Milk that’s too hot can kill the yeast, while milk that’s too cold won’t activate it properly. A good rule of thumb is that the milk should feel just warm to the touch.
3.3 Experiment with Flavors
If you want to give your honey buns a personal twist, consider adding a little cinnamon or nutmeg to the dough for extra flavor. You can also experiment with different glazes, like adding lemon zest or vanilla extract to the glaze for a unique touch.
4. Serving and Storing Your Honey Buns
Once your honey buns are ready, it's time to enjoy them! Here are some tips for serving and storing:
4.1 Serve Fresh
Fresh honey buns are best enjoyed right out of the oven while they’re still warm. Serve them as a breakfast treat, an afternoon snack, or as a sweet dessert. Pair with a hot cup of coffee or tea for a cozy experience.
4.2 Store Leftovers Properly
If you have leftovers, store your honey buns in an airtight container at room temperature for up to 3 days. You can also freeze them for longer storage. To reheat, simply pop them in the microwave for a few seconds or warm them in the oven at a low temperature.
5. Real-Life Story: Making Honey Buns with Family
One of the best parts about making homemade honey buns is that it can be a fun family activity. Take Sarah’s story, for example:
5.1 Sarah’s Honey Bun Family Tradition
Sarah, a mother of two, loves baking with her kids on weekends. One Saturday, they decided to try making homemade honey buns. Sarah says, "It was such a fun experience to have my kids involved in the process. They loved rolling the dough and adding the honey glaze. The honey buns were a hit at breakfast, and the kids were so proud of their hard work!"
This story highlights how baking can be a wonderful bonding experience for families. Plus, homemade honey buns make the perfect treat to share together!
Making homemade honey buns doesn’t have to be complicated. With this easy recipe and a little patience, you can enjoy fresh, warm, sweet buns that will delight your whole family. If you’re looking for the best baking tools or ingredients, visit Heavenly Delights Bakery for expert recommendations and top-quality products to make your baking experience even better!


 Walmart Bakery2.0 (5 reviews)
 Bissut Bakery4.0 (17 reviews)
 Bagel Deli Plus4.0 (198 reviews)
 Fratelli's Bakery & Cafe4.0 (470 reviews)
 We Bagel & Lunch3.0 (379 reviews)
 Union Bakery4.0 (330 reviews)
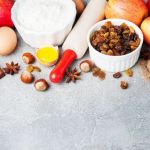 Why Baking with Fresh Ingredients Makes All the Difference
 How to Turn Your Favorite Cake into Cupcakes: Easy Baking Tips
 How to Make the Best Homemade Peach Pie with a Buttery Crust
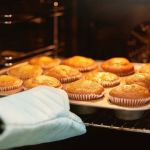 Why Freshly Baked Muffins Always Taste Better Than Store-Bought – Discover the Difference
 How to Bake the Perfect Chocolate Truffle Cake
 How to Make the Best Lemon Raspberry Cupcakes – Step-by-Step Recipe