
Discover How to Make Classic British Scones
- 1. The History of Scones: A Classic British Delight
- 2. Ingredients for Perfect British Scones
- 3. Step-by-Step Guide to Making Classic British Scones
- 4. Tips for Perfecting Your British Scones
- 5. Real-Life Story: A Scone-Baking Tradition
1. The History of Scones: A Classic British Delight
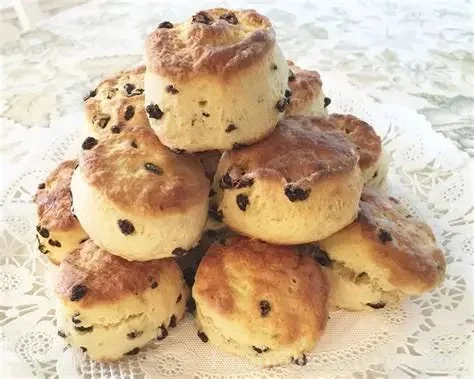
Scones are a staple of British culture, often associated with the iconic afternoon tea. Originating in Scotland in the 1500s, scones have evolved into a versatile baked good, enjoyed at breakfast, tea time, or as a sweet treat any time of the day. Historically, scones were made with oats and baked on a griddle, but over time, the recipe evolved to use wheat flour and baking powder, resulting in the light, fluffy texture we know today.
While the classic British scone recipe is simple, it’s deeply rooted in tradition. Served with clotted cream and jam, scones are the centerpiece of many gatherings and are often the subject of debate, particularly when it comes to the order in which the cream and jam should be spread. Whether you prefer your scones with a dollop of butter or a hearty serving of strawberry jam, the timeless appeal of this classic treat remains unchanged.

Baker’s Dozen of Central Village / bakers dozen putnam
PlainfieldNortheastern Connecticut Planning RegionConnecticut
50 E Main St, Central Village, CT 06354, USA
2. Ingredients for Perfect British Scones
To make classic British scones, you’ll need just a few simple ingredients. Here’s what you’ll need to get started:

Nothing Bundt Cakes / nothing bundt cake boston
NewtonMiddlesex CountyMassachusetts
170 Needham St, Newton, MA 02464, USA
1. Self-Raising Flour
The key to light, fluffy scones is using self-raising flour. This type of flour contains baking powder, which helps the scones rise beautifully in the oven. If you can’t find self-raising flour, you can easily make your own by adding 1 ½ teaspoons of baking powder for every cup of plain flour.
2. Butter
Use cold, unsalted butter for the best texture. The butter should be rubbed into the flour, creating a crumbly mixture. This helps the scones have that classic flaky, tender texture.
3. Milk
Milk adds moisture to the dough. While full-fat milk is traditionally used, you can substitute with plant-based milk if you prefer a dairy-free version.
4. Sugar
A small amount of sugar is added to the dough to balance the flavors. You can adjust the sweetness to your taste, but British scones are typically not overly sweet, as they are meant to be complemented by jam and cream.
5. A Pinch of Salt
Just a pinch of salt enhances the flavor of the scones, balancing out the sweetness and richness of the butter and milk.
3. Step-by-Step Guide to Making Classic British Scones
Making scones is a simple process, but it’s important to follow the steps carefully to achieve that perfect texture. Here’s a step-by-step guide to help you bake your own batch of classic British scones:
Step 1: Prepare the Oven and Ingredients
Preheat your oven to 220°C (200°C for fan ovens) or 425°F. Line a baking tray with parchment paper and set it aside. Gather all your ingredients, ensuring that your butter is cold, and your milk is at room temperature.
Step 2: Mix the Dry Ingredients
In a large mixing bowl, sift together the self-raising flour and a pinch of salt. Add the sugar and stir to combine.
Step 3: Rub in the Butter
Cut the cold butter into small cubes and add it to the flour mixture. Using your fingertips, rub the butter into the flour until the mixture resembles breadcrumbs. This process is key to creating that light, flaky texture.
Step 4: Add the Milk
Make a well in the center of the flour mixture and pour in the milk. Using a fork or your hands, mix the dough together until it forms a soft, slightly sticky ball. Be careful not to overwork the dough, as this can result in tough scones.
Step 5: Shape and Cut the Dough
Turn the dough out onto a lightly floured surface and gently knead it a few times. Roll the dough out to about 2 cm (¾ inch) thick. Using a round cutter, cut out the scones and place them on the prepared baking tray. Brush the tops with a little milk to give them a golden finish.
Step 6: Bake the Scones
Bake the scones in the preheated oven for about 10-12 minutes, or until they have risen and are golden brown on top. Remove from the oven and cool on a wire rack.
4. Tips for Perfecting Your British Scones
Here are a few tips to ensure your scones come out perfect every time:
1. Handle the Dough Gently
Overworking the dough will make the scones dense and tough. When mixing the ingredients, handle the dough as gently as possible to maintain its light texture.
2. Don’t Twist the Cutter
When cutting out the scones, don’t twist the cutter. Twisting can seal the edges, which prevents the scones from rising properly. Just press straight down for the best results.
3. Use Cold Ingredients
Cold butter is essential for creating a flaky texture, and using cold milk helps prevent the dough from becoming too warm. The cooler the ingredients, the better the scones will turn out.
4. Serve Immediately
Scones are best served fresh out of the oven, warm and soft. For the ultimate experience, serve with clotted cream and strawberry jam!
5. Real-Life Story: A Scone-Baking Tradition
For many, baking scones is a family tradition passed down through generations. I remember baking scones with my grandmother every Sunday afternoon. The smell of freshly baked scones filling the kitchen was always a sign that family time was near. My grandmother taught me how to perfect the scone dough, emphasizing the importance of using cold butter and handling the dough lightly. It was through these experiences that I developed a love for baking and a deep appreciation for the art of scone-making.
Every time I bake a batch of scones now, I think back to those afternoons and the lessons I learned. Whether it's for a tea party, a family gathering, or simply a morning treat, scones have a way of bringing people together and creating lasting memories.
For more baking inspiration and quality ingredients, check out Heavenly Delights Bakery for all your baking needs, from flour to mixers to expert advice.

 Whole Foods Bakery0.0 (0 reviews)
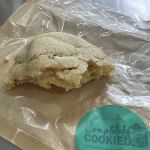 Completely Cookied LLC5.0 (25 reviews)
 LV Freshnadas0.0 (0 reviews)
 Rainbow Circle Backyard Port Royal Style5.0 (1 reviews)
 Creative Confections Boutique5.0 (2 reviews)
 Kroger Bakery3.0 (8 reviews)
 How to Make the Best Fresh Apple Cake
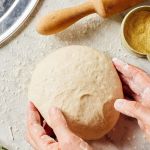 How to Make the Best Homemade Pizza Dough in 30 Minutes: Quick and Easy Recipe
 How to Make Homemade Scones with Fresh Berries
 How to Bake a Perfect Fudgy Brownie from Scratch – Step-by-Step Guide
 How to Make the Best Churros at Home
 How to Bake the Perfect Lemon Coconut Scones